





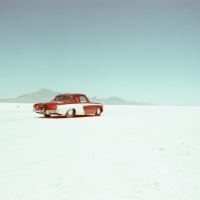
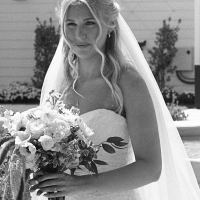
There's a moment that every film photographer remembers: the first time you get a roll back and see an image you made appear on a frame of celluloid. Not a file on a screen that can be deleted and reshot a hundred times, but a physical thing — light that struck silver and stayed. If you're reading this, you're curious about chasing that moment yourself. Good. Let's get you there.
This guide assumes nothing. Whether you've never touched a manual camera or you're a digital shooter looking to slow down, the goal here is simple: to give you everything you need to load your first roll, shoot it well, and get good results back. Film photography has a reputation for being intimidating and expensive. Some of that is earned. Most of it isn't. You can be making real photographs this week.
Why shoot film at all?
It's a fair question in an age when the phone in your pocket can produce technically flawless images. Film isn't sharper, cleaner, or more convenient than digital. It is, however, a fundamentally different way of working — and for a lot of people, a better one.
Film slows you down. A 35mm roll gives you 24 or 36 frames. A roll of 120 might give you as few as eight or ten. When every frame costs money and can't be reviewed instantly, you stop spraying and start seeing. You think about light, composition, and timing before you press the shutter. That discipline makes you a better photographer in any medium.
Film has a look that's still hard to fake. The way color negative film renders skin tones, the gentle roll-off in the highlights, the organic grain structure, the way it handles a bright window or a backlit subject — these are the product of real chemistry, and digital simulations still don't quite get there. You'll know it when you see it.
Film is tactile and permanent. You hold the camera, wind the advance, feel the shutter. At the end you have negatives — a physical archive that will outlive any hard drive. There's something deeply satisfying about that in a world of disposable files.
And — let's be honest — it's fun. The anticipation, the surprise, the small victories. Film brings the play back into photography.
Choosing your first camera
This is where most beginners freeze up, so let's make it easy. You do not need an expensive or exotic camera. You need a reliable mechanical body and a decent lens, and there are millions of them out there.
Start with a 35mm SLR
A 35mm single-lens reflex camera is the ideal first film camera. You see exactly what the lens sees through the viewfinder, you can swap lenses as you grow, and the classic models from the 1970s and '80s were built like tanks. Here are the ones worth seeking out:
- Pentax K1000 — The legendary student camera. Fully mechanical, almost indestructible, with a simple built-in light meter. If you want one camera that will teach you the fundamentals, this is it.
- Canon AE-1 / AE-1 Program — Hugely popular, easy to find, with aperture-priority and program modes that ease you in. Great glass available cheaply.
- Nikon FM / FM2 / FE / FE2 — Superb build quality and the gateway to Nikon's enormous lens ecosystem. The FM and FM2 are fully mechanical and shoot without a battery (the meter needs one, but the shutter doesn't), which makes them about as reliable as a film camera gets. The FE and FE2 add aperture-priority automation if you want a little help with exposure. Any of them is a camera you could hand down to your kids.
- Nikon FE10 / FM10 — More affordable, lighter-bodied options that still take the same legendary Nikkor lenses. A gentle, budget-friendly way into the Nikon system.
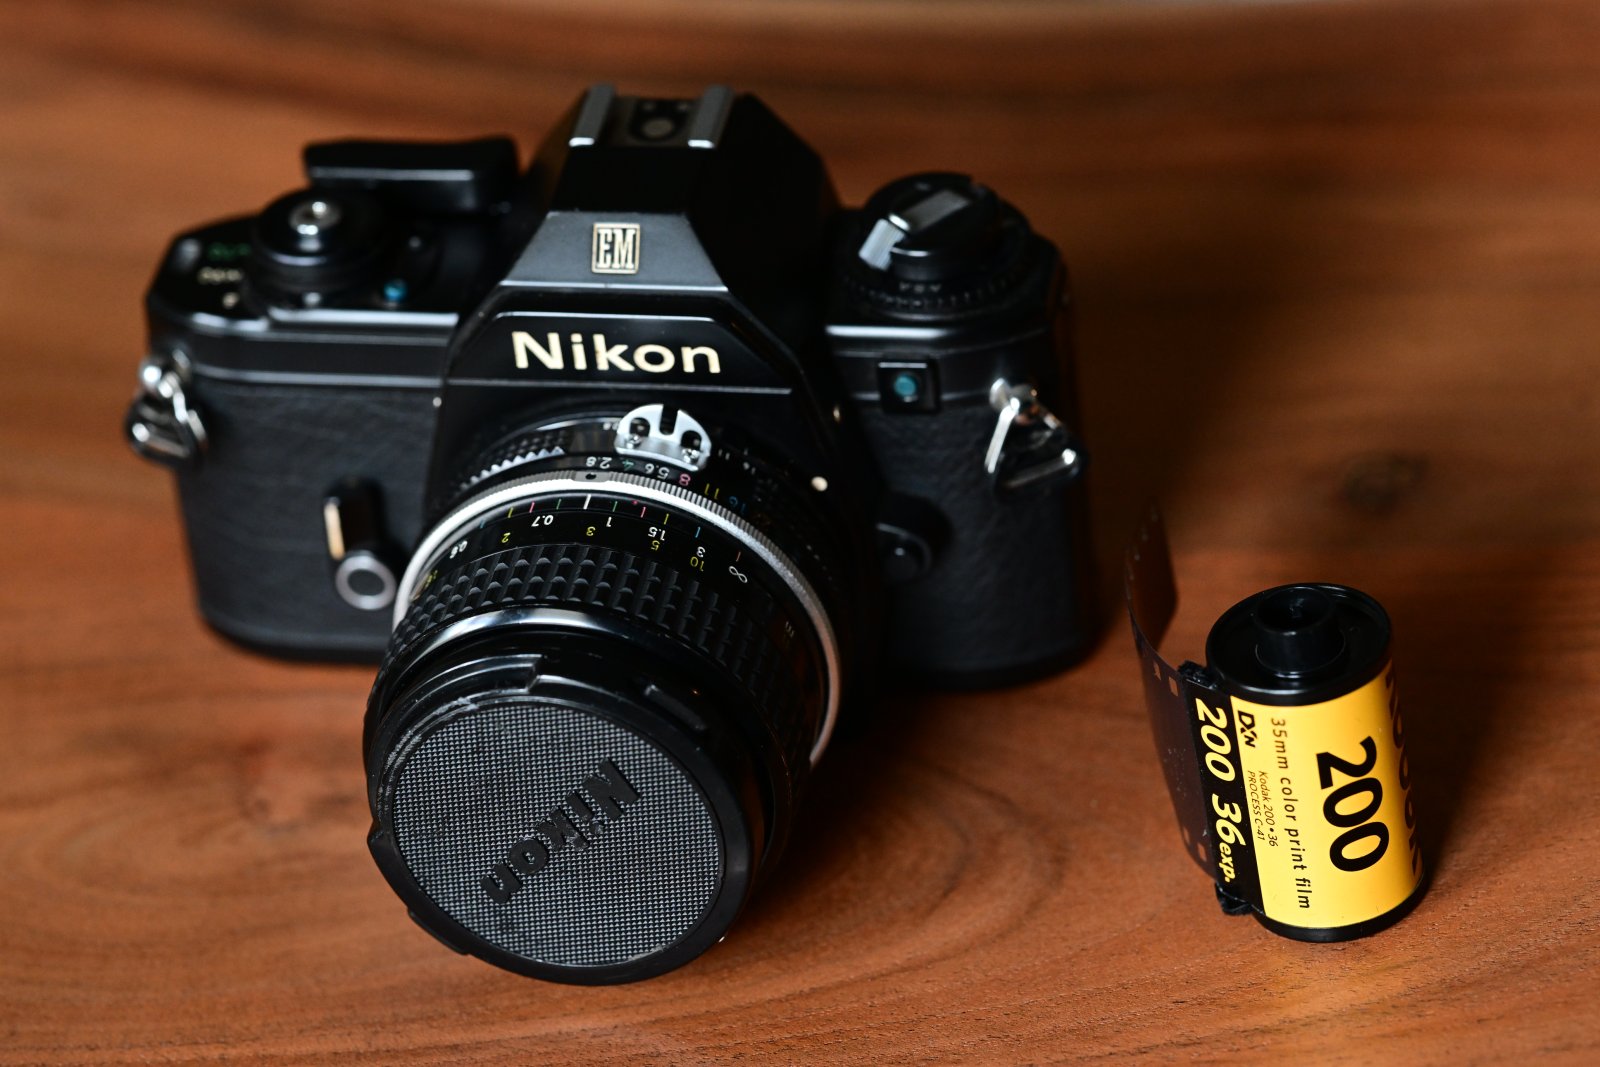
- Nikon EM — Small, light, and simple, with automatic aperture-priority exposure that does the thinking for you. It was Nikon's entry-level body, which makes it one of the cheapest ways onto the F-mount today — point, focus, shoot, and let the camera handle the rest. A great true-beginner pick if you want Nikon glass without the cost.
- Nikon F3 — A step up: Nikon's professional workhorse for years, tough and dependable, with aperture priority and a famously bright viewfinder. Slightly more camera than a true beginner needs, but if you find a good one, it'll never hold you back.
- Nikon N80 / F100 — If you'd rather have autofocus and modern metering, these later bodies use the same F-mount and are some of the best values in all of film right now — pro-level features for a fraction of their original price.
- Minolta X-700 — A joy to use, with a bright viewfinder and excellent metering. Often overlooked, which means good value.
- Olympus OM-1 / OM-2 — Beautifully compact and a pleasure to carry all day.
Any of these, paired with a 50mm "normal" lens, is a perfect starting kit. The 50mm focal length sees roughly the way your eye does and forces you to move your feet to compose — an underrated way to learn.
Other entry points
- Point-and-shoots — If you want the simplest possible experience, a quality compact like a Canon Sure Shot, Olympus Stylus/mju, or Yashica T-series will autofocus and meter for you. You just shoot. (Be aware that the cult favorites have been driven up in price; plenty of excellent non-famous compacts remain cheap.)
- Rangefinders — Cameras like the Canon Canonet QL17 or a Yashica Electro 35 offer a quieter, more discreet shooting experience. A great second camera once you've got the basics down.
- Medium format — Bigger negatives, breathtaking image quality, but a bigger learning curve and cost. Save this for when film has its hooks in you. (When you get there, you'll want a separate guide — and we'll have one.)
A word about Leica
No honest guide to film cameras would leave out Leica. The Leica M — the M6, M7, MP, and their kin — is, for many photographers, the camera all others are measured against: a precision rangefinder built to a standard of mechanical perfection that has to be felt to be understood. The viewfinder is glass and air, the shutter is a whisper, and the lenses are among the finest ever made. There's a reason these cameras have been carried by the great documentary and street photographers for the better part of a century.
It's also, frankly, not a beginner's purchase — and that's perfectly fine. A used M body and a single lens can cost more than a closet full of the SLRs above, and a rangefinder asks you to focus and compose in a different way than an SLR does. None of that is something you need on your first roll. But you should know it exists, because somewhere down this road, after the craft has its hooks in you, you may find yourself wanting one. Plenty of us do. Think of it not as where you start, but as one of the places this hobby can take you. The fundamentals you learn on a humble K1000 or Nikon FM are exactly the same fundamentals that make a Leica sing — so the time you put in now is never wasted, whatever you end up shooting later.
Where to buy — and what to check
For a guaranteed-working camera with a warranty, buy from a reputable used dealer like KEH, which rates and tests everything it sells. Local camera shops, estate sales, and thrift stores can turn up bargains, but you're rolling the dice. eBay is a vast market with great deals and great heartbreak in equal measure — buy from sellers with strong return policies and clear photos.
Whatever the source, check (or ask about) these before you commit:
- Shutter fires at all speeds, without sticking or sounding sluggish.
- Light seals (the foam around the door) aren't crumbling — these are cheap and easy to replace, but it tells you the camera's condition.
- Light meter responds when you point it at a bright vs. dark scene. (Note that some older cameras use discontinued mercury batteries; a few workarounds exist.)
- Aperture blades are clean and snappy, with no oil on them.
- Viewfinder and mirror are reasonably clear (some dust and haze is normal and harmless).
- Film advance and rewind turn smoothly.
A camera that needs a CLA (clean, lubricate, adjust) isn't a dealbreaker — it's routine maintenance for gear this old — but factor it into the cost.
Understanding film
Once you have a camera, you need something to put in it. Film comes in formats, types, and speeds. Here's what matters.
Formats
- 35mm is the standard. It loads into a cartridge, gives you 24 or 36 exposures, and is cheap and universally processed. This is where you start.
- 120 (medium format) is wider roll film that produces a much larger negative for stunning detail. It's a step up in camera, cost, and care.
Color or black & white?
This is partly aesthetic and partly practical. Black and white is forgiving, timeless, and — crucially — the only film you can easily develop yourself at home with minimal equipment. Color is more involved to process (most beginners send it to a lab) but gives you that rich, nostalgic look people fall in love with.
Within color, there are two families:
- Color negative (C-41) is the everyday workhorse. It has wide exposure latitude (it forgives mistakes), and it's what virtually every lab can process. Start here.
- Color slide / transparency (E-6) produces gorgeous, saturated positives you can hold up to the light, but it has very little exposure latitude and is less forgiving and more expensive. A later adventure.
Film speed (ISO)
Every film has a speed rating — its ISO — that tells you how sensitive it is to light. Lower numbers (ISO 100, 200) need more light but give you finer grain and cleaner images. Higher numbers (ISO 400, 800) work in dimmer conditions but show more grain. ISO 400 is the most versatile all-rounder and the best place for a beginner to start: bright enough for daylight, fast enough for cloudy days and shade.
Recommended films to start with
You can't go wrong with any of these:
Color negative
- Kodak Gold 200 — Warm, classic, affordable. A perfect first color film.
- Kodak UltraMax 400 — Flexible everyday speed, easy to find.
- Kodak Portra 400 — The professional standard for natural skin tones and gorgeous color. Pricier, but worth shooting once you're confident.
- Kodak Ektar 100 — Ultra-fine grain and punchy color for landscapes and bright light.
Black & white
- Ilford HP5 Plus 400 — The classic, forgiving, do-anything B&W film. If you develop at home, start here.
- Kodak Tri-X 400 — The legendary photojournalist's film, with beautiful grain and tonality.
- Ilford FP4 Plus 125 — Finer grain for bright conditions and a more refined look.
Pick one film and shoot several rolls of it before you switch. Learning how a single stock behaves in different light is worth more than sampling a dozen.
The fundamentals of exposure
Getting a good exposure means letting in the right amount of light. Three controls work together — what photographers call the exposure triangle:
- Aperture (the f-number, e.g. f/2.8, f/8, f/16) controls how wide the lens opening is. It also controls depth of field — how much of the scene is in focus. A wide aperture (low number like f/2.8) gives a blurry, dreamy background; a small aperture (high number like f/16) keeps more in focus.
- Shutter speed (e.g. 1/60, 1/250, 1/1000 of a second) controls how long the shutter stays open. Fast speeds freeze motion; slow speeds let in more light but risk blur from shake or movement. As a rule of thumb, handhold at a shutter speed at least as fast as your lens length — 1/60 or faster with a 50mm lens.
- ISO is set by the film you loaded, so on film it's fixed for the whole roll. Choose your film for the light you expect.
Your camera's light meter does the math for you. In manual mode you adjust aperture and shutter until the meter reads correct; in aperture-priority mode you pick the aperture and the camera picks the shutter speed. Either way, the meter is your guide.
The Sunny 16 rule
Here's a piece of magic worth memorizing. On a bright, sunny day, set your aperture to f/16 and your shutter speed to 1 over your film's ISO. So with ISO 400 film, that's roughly f/16 at 1/400 (use the nearest speed, 1/500). From there you can open up:
- Sunny → f/16
- Slight overcast / hazy sun → f/11
- Overcast → f/8
- Heavy overcast → f/5.6
- Open shade / sunset → f/4
This lets you shoot confidently even if your meter fails, and it builds an intuition for light that will serve you forever.
A note on latitude
Color negative and black & white film both prefer to be slightly overexposed rather than underexposed — shadows hold detail far better when you give them a little extra light. A common trick is to "rate" ISO 400 film at 200, which gently overexposes it for richer shadows. Slide film is the opposite: protect your highlights and expose precisely. When in doubt with negative film, err toward more light.
Loading, shooting, and rewinding
The mechanics vary slightly by camera, but the basics are universal.
Loading: Open the back, drop the cartridge into the chamber, pull the film leader across to the take-up spool, and engage the sprockets. Advance once or twice until the film grabs and the rewind knob turns (that confirms it's loaded right), then close the back and fire off the blank frames until your counter reads "1." Many a beginner has shot a whole "roll" that was never advancing — always confirm that rewind knob spins as you wind.
Setting ISO: Most cameras have an ISO/ASA dial. Set it to match your film (or your chosen rating). Forgetting this is the single most common beginner mistake — your meter can't expose correctly if it doesn't know the film speed.
Shooting: Meter, focus, compose, breathe, release. Wind on. Repeat. Resist the urge to chimp at a screen — there isn't one. Trust your process.
Rewinding: When you reach the end of the roll, the advance will stop. Don't force it. Press the rewind release button (usually on the camera's base) and crank the rewind lever until tension releases and the film is safely back in its cartridge. Now you can safely open the back.
Getting your film developed
You've shot a roll. Now what?
Send it to a lab (the easy route). Drop your film at a local lab or mail it to one of the many excellent mail-order labs. They'll develop it and either return your negatives, send you scans (digital files), make prints, or all three. "Develop and scan" is the standard package and gets you images on your computer to share. Turnaround is usually a few days to a couple of weeks.
Develop black & white at home (the rewarding route). Home B&W developing is more accessible than people think and dramatically cheaper per roll. You'll need a light-tight changing bag, a developing tank and reel, three chemicals (developer, stop bath, fixer), a thermometer, and somewhere to hang film to dry. The process takes under half an hour, happens in daylight once the film is loaded in the tank, and the first time you pull a strip of your own developed negatives off the reel is genuinely thrilling. (We'll publish a full step-by-step home developing guide — for now, know that it's well within reach.)
From negative to image: scanning and printing
To share or print your work, the negatives need to become positive images. There are three common paths:
- Lab scans — The simplest. Your lab digitizes the negatives and sends you files. Quality ranges from basic web scans to high-resolution files suitable for large prints.
- Home scanning — A dedicated film scanner, or a flatbed with a film holder, lets you scan on your own schedule and control the look. Many shooters now "scan" with a digital camera and a macro lens for speed and quality.
- Darkroom printing — The traditional craft: projecting the negative onto light-sensitive paper and developing the print by hand. It's a deep and rewarding discipline of its own, especially for black & white, and the silver gelatin prints it produces have a quality no inkjet matches. A wonderful place to grow into.
Ten tips that will save you rolls
- Shoot a lot, and shoot deliberately. The fastest way to improve is volume — but make each frame count.
- Master one camera and one film first. Familiarity beats variety. Learn how your gear and your stock behave before adding variables.
- Always confirm the film is advancing. Watch the rewind knob turn. This single habit prevents heartbreak.
- Set your ISO every time you load a roll. Make it part of your loading ritual.
- Overexpose color negative film slightly. When unsure, give it more light. The shadows will thank you.
- Keep notes early on. Jot down your aperture, shutter, and lighting for memorable frames. When you see the results, you'll learn what worked.
- Watch your light. Film loves good light. Shoot in the golden hours, watch where shadows fall, and be wary of harsh midday sun on faces.
- Don't bake your film. Heat and time degrade film. Keep unexposed rolls cool, and get exposed rolls developed reasonably promptly.
- Ask for hand inspection at the airport. Modern CT scanners can fog film. Carry it in your bag and politely request a hand check.
- Embrace the imperfections. Grain, light leaks, the occasional surprise — these are features, not failures. The character is the point.
Common beginner mistakes (and how to avoid them)
- Film never advanced → Confirm the rewind knob spins as you wind after loading.
- Wrong ISO set → Every roll, every time, match the dial to the film.
- Forcing the advance at roll's end → Press the rewind release before cranking the rewind lever.
- Opening the back mid-roll → Always rewind fully into the cartridge first. (If you do expose part of a roll to light, all is not lost — wind past the ruined frames and carry on.)
- Camera shake → Keep your shutter speed up, brace yourself, or use a tripod in low light.
- Underexposing → Trust your meter, and lean toward more light with negative film.
Everyone makes these. The negatives forgive more than you'd think, and the lessons stick.
Where to go from here
Once you've got a few rolls under your belt and the basics feel natural, the world opens up. You might step up to medium format for those huge, luminous negatives. You might build a darkroom and start making prints by hand. You might fall down the rabbit hole of vintage glass, alternative processes, or large format. There's no end to how deep this craft goes — that's part of its magic.
Most of all, find your people. Film photography is a community, and you're now part of it. Share your work, ask questions, swap recommendations, and learn from others walking the same path.
So load a roll, get out there, and make some photographs. The first frame is the hardest part — and you're already past it.
This guide will continue to grow with added examples, deeper tutorials, and linked resources. Bookmark it and check back as it develops.